Installing a stair runner may seem intimidating, and the good news is that adding ours was pretty damn simple and we love how it looks (and feels underfoot). So here is a complete tutorial for how to set up yourself, for example how to combine two runners if a person isn’t long enough to your stairs, the way to finish off the bottom cleanly, and also how to provide the staircase and railings a fresher appearance too.
PROJECT STEP BY STEP
The entire job took us about 20 hours total, but that included more than just installing the runner. We also gave the entire staircase a fresher appearance with painted risers and stained railings. So below are the total steps for your makeover, but we’ll be picking up around how to measure stairs for carpet.
We read on the web that it might typically cost approximately $318 for a comparable installation job by a pro which does not include the cost of the runners or the padding themselves (or so the staining/painting/priming we squeezed into this makeover), so this might easily be twice as much if we’d hired it out.
PREPARING AND PAINTING THE STAIRS
Time to paint those risers. Since we knew it would take lots of coats, Sherry taped off the bottoms to create things speedier than having to thoroughly edge every time, and that I applied a coat of primer (because it is low-VOC, but maybe not no-VOC) to block any wood bleed.
With the primer tender, Sherry implemented the first coat of paint (it is the same no-VOC Simply White in semi-gloss that we’ve used on trim anyplace else). Applied coat #2 of paint and I moved in for coat #3 after, just to make sure we receive a fantastic solid white tone on every tread.
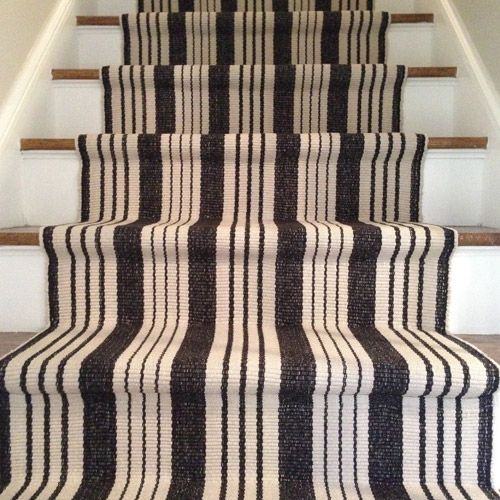
Right before bed, I applied a coat of Rejuvenate to every tread to restore the wood end (more on this ). I worked my way up the staircase straight before bed so that it could heal overnight while we were up there sleeping. In the morning we awakened to a much fresher appearing staircase. We love the appearance of bare stairs like this, so we soaked up this pretty sight, then pushed onward towards our objective of a new brand new runner, we’d simply prefer some excess padding with young children at the house to cushion the blow if anyone does autumn.
As we wanted to have as much messy stuff done before the runner was set up (stain drips to new carpet = the stuff of nightmares) we dove to staining the railings a deeper tone so that they’d pick up some of those black at the runner (more about what prompted us to do that here). We found that this PolyShades blot + polyurethane didn’t require any heavy sanding (only a light roughing up) in a nice deep color, so we grabbed it.
Unlike stain, you do not wipe off the surplus once it is applied. The rail on the ideal side of the stairs is pictured here, but that I also did so to the long rail that goes up the left side of the wall (we had removed that if we painted the walls and ceiling a week and decided to keep it off so I could easily do that staining outside).
The initial jacket didn’t quite dry as dim as we hoped, but we crossed our fingers a second one could do just fine. The first should’ve been dry after 6 hours but it was still tacky, so rather than wait an unknown quantity of time for it to heal, we changed gears and started painting the newel posts, which we decided would look best white like the other stair articles after seeing a few Pinterest images like this and enjoying them. Such as the risers, Sherry recorded off it so I (the perfect cutter-inner of the two people ) could apply the primer.
Sherry implemented the first coat of white paint (also Simply White) into the articles while I browse bizarre Buzzfeed articles to her out loud to pass the time.
Sherry applied coats 2 and 3 of white paint into the articles about three hours apart.
With the post paint warm along with the first coat of stain on the rail over fully healed, I could return to using our second coat of stain. Beforehand, I had to rough it up slightly with some fine steel wool.
Thankfully the second coat made it darker, just like we expected. We’re aiming for it to pick up on the black stripes in the runner in addition to the black espresso console table along with the oil-rubbed bronze lighting fixture nearby at the foyer.
More For You:
How to Wash Gold and Save from Tarnish Using Simple Pantry Ingredients