We had a totally different article planned for now, but then a super fun/random project dropped into our laps on Monday night. We weren’t certain how things could turn out (we’re rather making up a DIY technique as we moved along), but to say that we’re pleasantly surprised is a giant understatement. This might be my favored under $10 project in the background of my life.
And it may easily be replicated with any window that you find in a thrift store, architectural salvage shop, or even in the local Habitat for Humanity ReStore. SAVE ALL THE GORGEOUS OLD WINDOWS, GUYS!
Or you could just wander the streets hoping to be in the right place at the ideal time because that’s actually how my tale of inheriting this window starts. Should you follow me on Instagram Stories, you may have heard me gleefully inform The Fateful Tale Of The Old Diamond Window, wherein I randomly took a longer route in my evening walk and it led to me coming down our road about ten minutes later when I do.
And in the exact moment, I bumped into our neighbors since they were loading an aged diamond-paned window in their truck to bring it to the dump. Do you want this old window? It’s super rotten so we were going to take it into the dump, but maybe you can do something fun with it?!”
I hope you know how mad my face was when I essentially cried into their faces “YES I WANT IT SO BAD THANK YOU VERY MUCH!” And hurried away clutching it whispering”my precious.”
It is white on the opposite side, and the purple side above was the road facing side of the window, which is, in fact, extremely brittle and water-damaged (some of this trim was lost and only full of caulk, the real surfaces of the window trimming were shattered and even missing, etc). So my first idea was that maybe I could paint it with outside paint and utilize it in the rear garden — maybe as some type of trendy trellis-alternative for something leafy to grow up.
Well, within a couple of minutes of conversing about some alternative possibilities yesterday, John & I chased another program (PIVOT!) This would mean it wouldn’t continue to get wet & rot outside… and, well, all of the pictures you’re about to see were actually taken THIS MORNING. That is right, we started (and finished!) This project today. As in, just hours ago. And I was overly excited to discuss my other already-written post today, so I whipped up this one for ya.
In terms of our stuff, all we used was our completely free secondhand window, two D-rings to hang it, about $9 in tissue paper, and a spray bottle filled with water which we had on hand. And over about two weeks (by about 1 pm today) we’d turned this old window to something we are mad about. I KNOW THIS PICTURE MAKES YOU WORRIED. It all worked out, even though this looks like a lecturing job gone wrong.
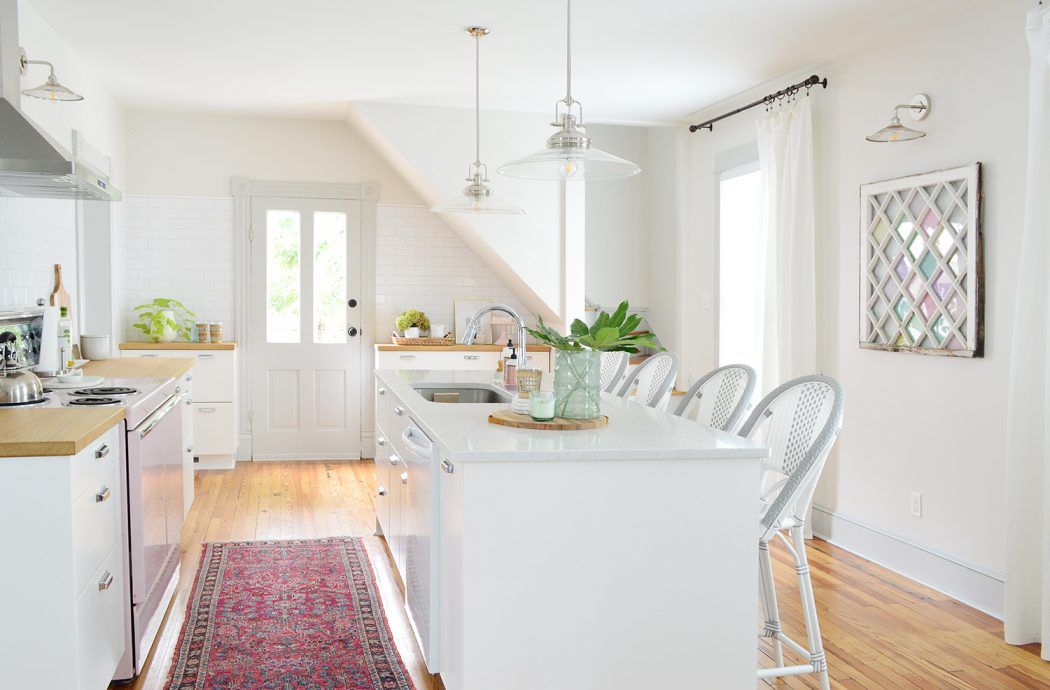
This whole thing started because I wanted to find a way to utilize the diamond window within the beach house, somewhere that we can see it more than having it tucked away from the backyard and somewhere that it could be protected from the elements so that it wouldn’t eventually just fall apart entirely. And this spot across from the island was perfect.
You may remember that we had this massive beachy print there. We LOVE this print it is the perfect color and is pretty affordable for a framed artwork piece this big, but I found a much better place for this AND it opened that area right under the sconce for my piece de resistance: The Diamond Window Of My Dreams.
Because I know you enjoy closure. The colors go so nicely with the old chippy blue doorway to the laundry room.
More For You:
INSTALLING A SUBWAY TILE KITCHEN BACKSPLASH
How to Wash Gold and Save from Tarnish Using Simple Pantry Ingredients